 Photinerary
Tools
Each calculation behind the planners, on its own screen, for any place and date, plus an exposure calculator and light meter.
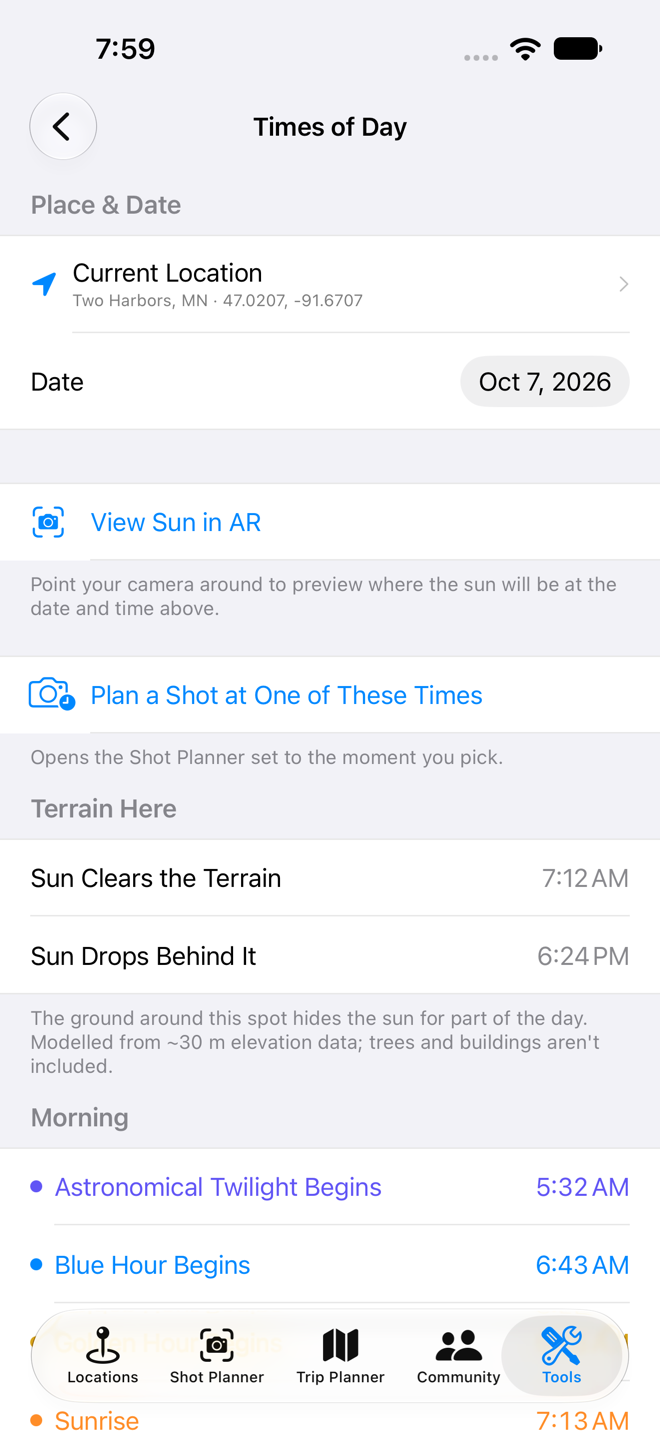
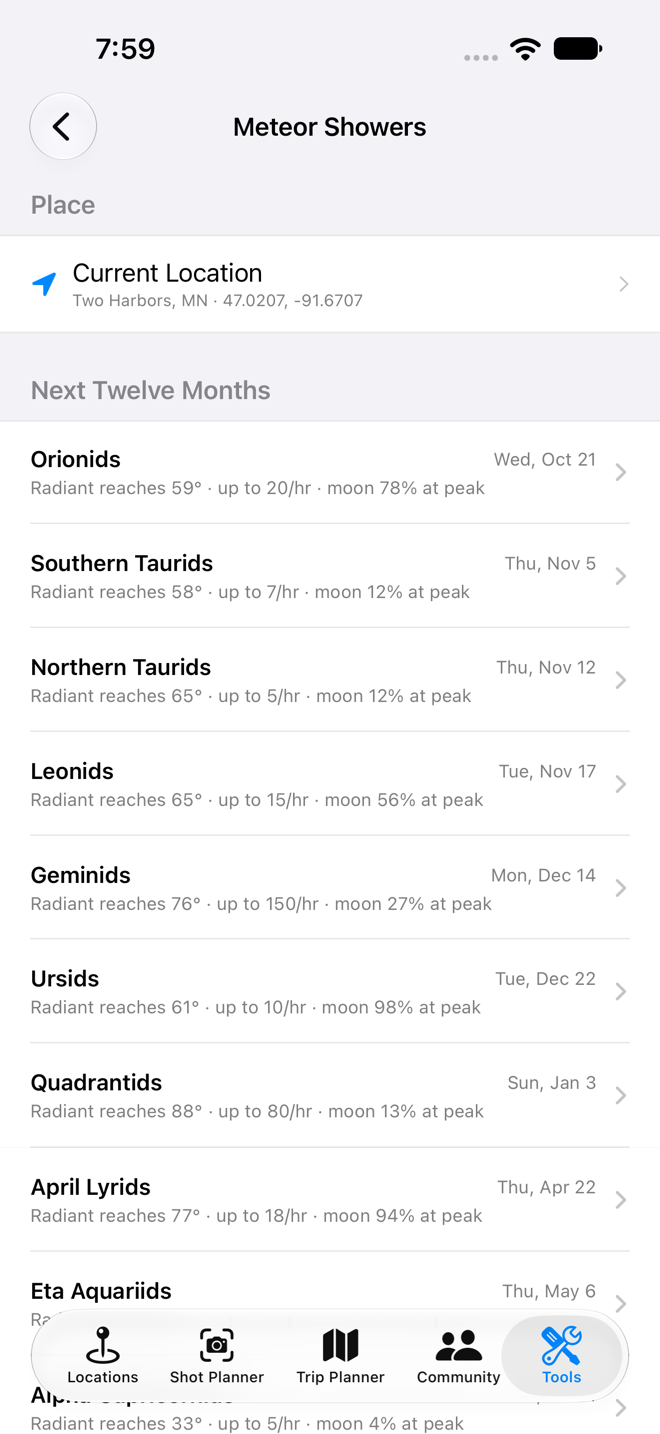
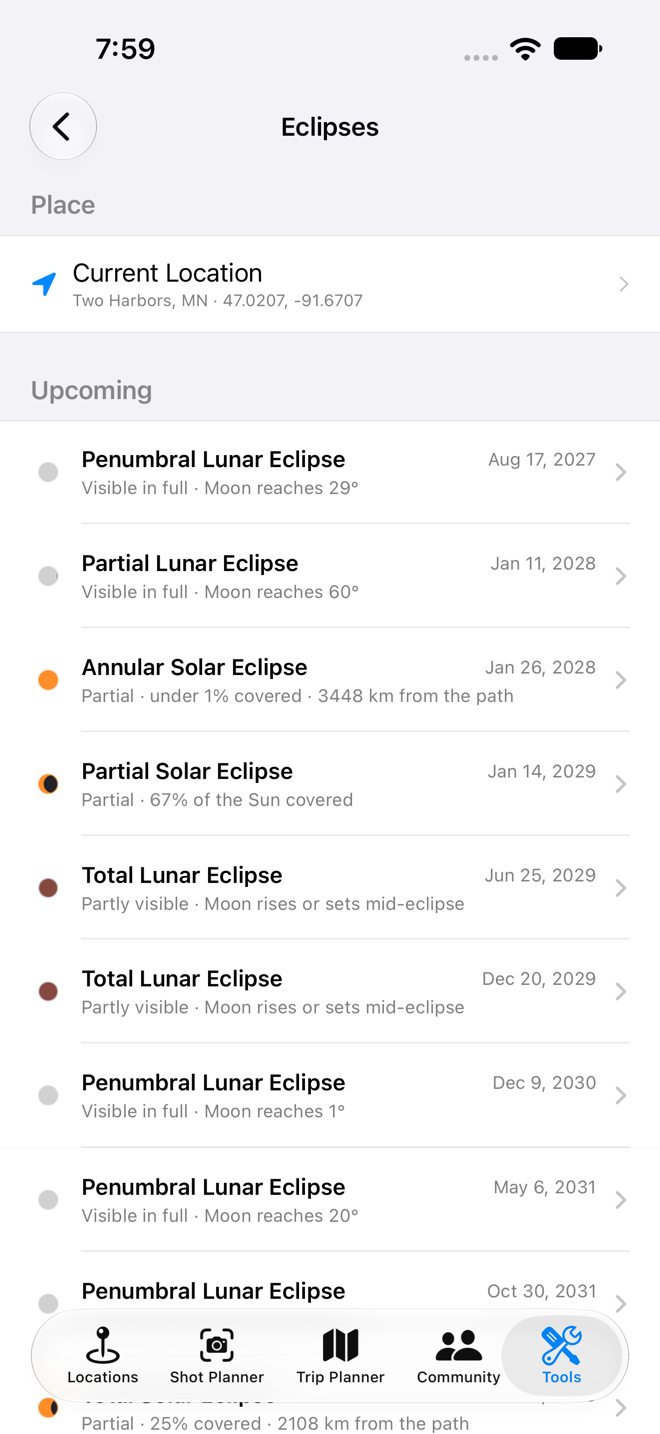
Every tool works for any place and date: you don't need to save a location first. Each starts at your current location if you've allowed it. Times are shown in that place's own time zone.
Times of Day
- Open Tools › Times of Day.
- Choose a place and a date under Place & Date.
- Read the Morning and Evening lists, in time order: astronomical twilight, blue hour, golden hour, sunrise or sunset, and the end of golden hour, each with its time. Below them, Astronomical Darkness Tonight gives that night's fully dark window.
Rows are colored by phase. Where the terrain hides the sun for part of the day, Terrain Here shows when it actually clears the ridge; see terrain. View Sun in AR shows the sun's path through your camera (iPhone and iPad).
- Golden hour
- The sun between 6° above and 4° below the horizon: warm, low, directional light.
- Blue hour
- The sun between 4° and 6° below the horizon: deep blue sky with lights still visible.
- Astronomical darkness
- The sun more than 18° below the horizon: the sky is as dark as it gets.
Sky Forecast
Covered in detail in Sky Forecast, alerts and summaries.
Moon Planner
Pick a place and date for moonrise, moonset, the phase and how much of the moon is lit. Use it to plan for a bright moon lighting a scene, or a dark moonless sky. On iPhone and iPad you can preview the moon's path in AR, dragging left or right to move through the night.
For where the moon will be relative to a subject, use the Shot Planner and Find Alignment.
Milky Way
- Open Tools › Milky Way and choose a place and date.
- Core Visibility Tonight shows three windows: Dark Sky, Core Above Horizon, and the Shootable Window where both overlap. The overlap is naturally shorter than either.
- Best Nights ranks the next 30 days by how long the core is up in the dark, favoring nights with little or no moon.
From mid-northern latitudes the core is visible roughly February to October, low in the south. The tool also says how upright or flat the band stands, which decides whether a vertical or horizontal frame suits it.
Meteor Showers
- Open Tools › Meteor Showers and choose a place.
- The next twelve months of the major showers are listed with their peak dates for that year, worked out from astronomy rather than copied from a table.
- Open a shower and read Best Nights Around the Peak. A bright moon on peak night often makes the night before or after the better trip.
The tool reports a window when the radiant is at least 20° up during darkness, since rates fall away when it's low. For the frame, aim 40° to 60° away from the radiant: meteors near it are short; the long trails appear further out. You can plot a shower's radiant as a line in the Shot Planner.
Eclipses
- Open Tools › Eclipses and choose a place.
- Every solar and lunar eclipse coming up is listed, drawn as it will look from there.
- Open one for its timings from your spot. For a solar eclipse you'll see how much of the sun is covered and, if you're outside the path of totality or annularity, how far off it you are.
A lunar eclipse looks the same everywhere it's visible; the only question is whether the moon is above your horizon, and catching one as it rises or sets often makes the better photograph. A solar eclipse changes over a few kilometres. Eclipse paths and timings are checked against NASA's published tables.
Eye and sensor safety. Never look at or point an unfiltered lens at a partially eclipsed sun. Use a certified solar filter, and take it off only during totality itself.
Obscuration is the fraction of the sun's area covered; magnitude is the fraction of its diameter. A "90% eclipse" by magnitude covers about 83% of the area, and the sky stays bright.
Dark Skies
A map with a night-sky brightness layer, to spot dark areas away from city glow, and the certified Dark Sky Places nearby. Use it to scout astrophotography locations, then save the spot to Locations.
Annual Plan
- Open Tools › Annual Plan and choose a location and a year.
- The map shows the rise and set directions of the sun and moon for every full-moon night, and the Milky Way's best night each month. Toggle the Sun, Moon and Milky Way layers to thin it down.
- Export a printable PDF: Letter or 16×20 inch, landscape or portrait, with a full-page map and a page of details. The map matches the zoom and style you last set.
Tide Predictor
Pick a place and date for the tide curve and high and low times. Predictions come from the nearest NOAA station when one is close enough, which covers U.S. coasts, territories and the Great Lakes. Elsewhere it shows a rough estimate from the moon's position, clearly labeled as an estimate. Don't rely on the estimate for safety on tidal flats or sea caves; check a local tide table.
Exposure
Work out equivalent exposures, allow for filters and film, and meter with your phone. Open Tools › Exposure, or Exposure… in a shot's ··· menu, which also suggests light for the planned moment and uses the shot's lens.
The screen at a glance
Everything fits on one screen, top to bottom: the metered reading, your three settings with a dial, the answer, and your setup.
Equivalent exposure
- Set the reading on the Metered line at the top. Tap the camera button beside it to meter with the phone, or tap the line itself to enter what a light meter or another camera said, or to pick a Typical Light level.
- Under Worked out automatically, choose Shutter, Aperture or ISO. That tile fills in solid and reads AUTO: it's the one the app works out, and you don't set it.
- Tap one of the other two tiles. It's outlined and reads SETTING, with an arrow down to the dial. Turn the dial: it moves through only the values your camera has, clicking past each, and the AUTO tile follows so the exposure stays equal, like aperture or shutter priority on a camera.
- Read the answer card: what to shoot (or, for a long exposure, how long to give), with a line for each thing that changed it. If your camera can't land exactly on the answer, it says how many stops over or under the nearest setting leaves you; if a dial runs out, it says which and what to change.
Your camera
Your camera, film and filters are the Setup chips at the bottom, and they're remembered, so you set them once per outing. Camera and film go together: choosing a digital camera clears the film, and choosing a film camera (or a film) brings back the film and film camera you last used. Choose a Camera: a digital camera, a 35mm SLR, a rangefinder, a medium-format leaf shutter, a 4×5 view camera, or a fixed 110 or disposable camera. Each has only the speeds and apertures such cameras usually have, so answers are settings you can actually dial. In the camera chip, tap Add a Camera… to enter your own body's fastest and slowest speeds, aperture range, whether it moves in full, half or third stops, and whether it has B. A fixed camera has one speed and aperture, so the tool tells you the film speed the light needs instead.
Filters, bellows and long exposures
- ND filter: from 1 to 20 stops, named as sold (a 10-stop is an ND1000). A 1/60 reading becomes 16 s.
- Other filter: a polarizer, or a black-and-white contrast filter (yellow 1 stop, orange 2, red 3), at typical factors. Check your own filter's figure.
- Bellows draw (4×5 cameras, under Stars and lens): focused close, a view camera needs more exposure. At 1:1 that's two stops.
- Past the slowest marked speed, the answer is on B. Tap Timer in the answer card to time it; the screen stays on while it runs.
Film and reciprocity
Choose a Film and the ISO is set to its box speed. Rate it higher or lower and the tool tells you how many stops you're pushing or pulling. Long exposures are corrected for the film's reciprocity: the extra time film needs when an exposure runs past a second or so.
- The figures come from each manufacturer's own data, named under the result: Ilford's formula for its films and Kentmere, Kodak's tables for Tri-X and T-Max (with its development changes), and Fujifilm's for Acros II, Velvia 50 and Provia 100F.
- With the shutter on Auto, the result is the time to actually give, for example HP5 Plus metered at 10 s: give 20 s. With the shutter chosen by hand, the aperture or ISO opens up to cover the film's loss instead.
- Fujifilm gives its corrections as a wider aperture, so for those films the tool says how far to open up.
- Kodak publishes no correction past 1 second for Portra, Ektar and Gold, or past 10 seconds for Ektachrome E100. The tool says so and suggests bracketing, rather than inventing a figure.
- Beyond a maker's last published figure the correction is an estimate, and labeled as one. Where the maker advises against an exposure that long, it says that too.
Film format doesn't change exposure. A reading is the same on 35mm, 110, 120 or 4×5, because the f-number already allows for the size of the picture. Format changes the equivalent focal length, which the Lens section shows.
Metering with your phone
- Tap the camera button on the Metered line and point the phone at the scene.
- The reading averages the frame, weighted to the centre. Tap a point to spot-meter it; on phones with a telephoto camera, choose it for a tighter spot.
- Tap Use to put the reading in the Metered column.
It works like a camera's own meter: the phone reports the shutter speed and ISO it chose, and the tool turns them into an exposure value. It measures reflected light and assumes the scene averages to mid grey, so snow reads too dark (open up) and dark rock too bright (stop down). It can't measure the light falling on a subject, as a handheld meter with a white dome does.
- Calibrate once. Each phone model reads slightly differently. Meter an evenly lit, mid-toned surface with a meter or camera and with the phone, and set the difference under Calibration. It's kept for that phone model.
- Low light runs out. In deep twilight the phone's camera reaches its longest exposure and highest ISO. A little past that the reading is shown as an estimate; further, it says it's too dark and suggests Typical Light.
Lens and stars
Tap Stars and lens at the bottom and enter the focal length (and, for a digital camera, its resolution) for the longest exposure before stars visibly trail: the NPF rule for digital sensors and the older 500 rule for film. Both are for stars near the celestial equator; nearer the pole, stars trail more slowly. The row shows the limit for your current lens, and at night the answer card warns when an exposure is longer than it.
Typical Light
Starting points from the standard exposure value table: full sun EV 15, overcast EV 12, just after sunset EV 9 to 11, the full moon itself EV 15, a landscape under a full moon EV −3 to −2, the Milky Way core EV −11 to −9, and more. They're typical values, not a reading. Opened from a shot, the list starts with the light likely for the planned moment, from where the sun and moon will be (not the weather).
Sun and Moon AR
On iPhone and iPad, AR views in Times of Day, Moon Planner and Milky Way show the path across the sky through your camera. Hold the phone up and turn around; drag left or right to move the time. The spacing of the time marks along the path is set in Settings.